I can't believe it's been almost a week since I last posted. A week in which we experienced major outdoor home repairs, a trip to the country to pick up Tippi (where she had been staying so she wouldn't be freaked out by said home repairs), and a sudden onset of some type of bug or virus that felled me for a few days. But, better late than never, I am finally going to share my Art & Soul class experiences. Approaching things in my typical oddball fashion, let's start at the end.
Irene, Leslie and I all took Paste Paper Extravaganza, taught by the wonderful Albie Smith, as our final class. I was SO psyched up to take this class as learning how to make paste paper has been on my to-do list for a few years now. Yes, I'd read how-to information on the web, but I wanted my learning experience to be hands-on with someone experienced. I sure got what I wanted! Albie's class was just what I had hoped it would be: patient instruction from an expert, with lots of technique demonstrations and the opportunity for a lot of personal creation. Lots of play!
I learned so much in this class. Most importantly, I learned how easy this art form is to create! Our class started with Albie explaining the various types of paste that can be used and why she prefers her method. A quick demo of creating the paste was given, then some of this paste was transferred to various containers so paint could be stirred in. It reminded me exactly of mixing highlights with Nancy!
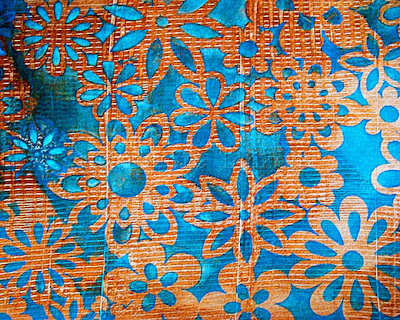
Albie was also reassuring, telling us we could use any acrylic paints, even cheap craft paints, although we should expect some to give us better results than others. And then she created her first paste paper demo of the day, creating magic before our very eyes. That was it? Such beautiful papers could be created so easily? I was blown away; I couldn't wait try it myself. And remember, this was right at the beginning, using only one colour of paint and minimal tools for marking the surface. The image you see above is a one-colour piece of paste paper, as is the blue image above it. Your eyes aren't fooling you, you are seeing tonal changes; this happens as you use tools as simple as an old credit card to mark the paper. Pure magic.
The day progressed, with Albie introducing us to two-paint-colour methods and then multiple colours, plus she provided inspiration on a myriad of tools to mark our paper. I particularly enjoyed working with the Crafter's Workshop stencils I had purchased at the Art and Soul store (thanks, Maria!) like the flower stencil below, and look forward to buying more of these high-quality stencils; they're a joy to use when creating paste paper. As the hours passed, we filled up the sides of the classroom floor with our creations and even spilled out into the hallway. How I wish I had brought a camera to class to capture these colourful displays!
By the end of the day, I had created 19 large sheets of paste paper and all were dry enough to be packaged up for the trip home. Leslie and Irene also had a large quantity of lovely finished works. Again, I wish I had photographs of some of their special pieces. We had learned techniques we certainly won't forget, met some great people, and had a lot of fun working in a medium where I don't think you can make a mistake. If you don't like what you've done, you can always work on it later or cut it up and use the bits you do like!
Throughout the paragraphs here, I have included photographs showing some of the detail in a few of my paste paper creations. Please remember these were all my initial attempts at this art form. Even so, I am very pleased with my class efforts. And after taking the amazing Surface Magic class taught by Marie Otero (more on that gem in the days to come) and learning I can run just about any paper through my printer if it's properly prepared, I can't wait to begin printing some of my digital art on my paste paper. What fun that will be! And then there's the digital possibilities. These patterned papers make great backgrounds and textures for use in Photoshop, as witnessed below. I created this using one of the photographs I took of my paste papers as a texture, along with a photograph of a hanging basket of flowers I just took in Port Hope when we drove out to pick up Tippi. My mind is reeling with plans for future projects!
Finally, to Albie Smith: I will always remember this class and am sure I will be making paste paper for years to come. Thank you, thank you!


5 comments:
It was a fun class, wasn't it? I didn't think about using them as backgrounds in Photoshop.....You've got me thinking! Looking forward to the rest of the A&S posts.
wow yummy papers there!
Welcome home and be well...it looks like you have had an exciting workshop with infinite possibilities for future play. Imagine and LIVE in Peace, Mary Helen Fernandez Stewart
Those look like perfect backgrounds. I can adjust the "Opacity" and Bob's your Uncle...well, not your uncle, nor mine....
I will look forward to more of your interpretations of class! Very helpful.
Lenore -- what a wonderful class. Thanks for sharing some of your treasures with us.
Post a Comment