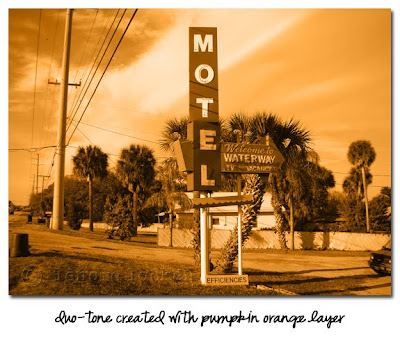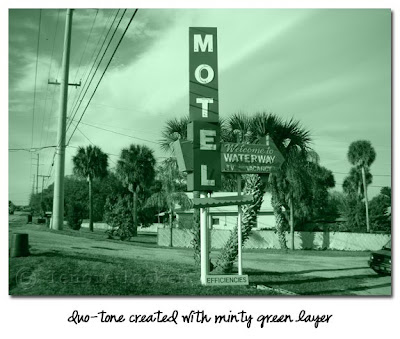

Procrastination. It could be my middle name. For ages now, I have been meaning to tackle some blog housework; specifically, adding labels to my posts. It would have been an easy task -- if I hadn't waited until I had 200+ freakin' posts! Even before I hit the 200 mark, I was putting this task off simply because I knew it would be a mind-numbing, time-consuming job.
Be proud of me, though. I finally started last night and, this afternoon, I had applied appropriate labels to each and every blog post here. At times it was very frustrating but I muddled through.
In the long run, I don't even know if this will prove useful. But it's done now and I will keep it up. I was even inspired to have a look through my "2009 Projects" folder to see if there were any photoshop projects I had started this year and then abandoned. And yes, there were a couple. One in particular caught my eye: a duo-tone experiment.
This is so stinkin' easy. Here's how to create your own duo-toned image. First, open up a photo in photoshop; you can mess with it if you want -- bumping up contrast and increasing saturation, perhaps, or maybe you want to completely desaturate it -- but for the purposes of this quickie experiment, let's not. You can always go back and do that later.
Next, create a new layer. Then go to the Edit menu and choose Fill, choosing Color and then picking a colour of your choice. Above, you'll see that I did two different duo-tones using the same image; on the first I chose an orange tone, on the second, a light green. After you choose your colour, click Okay and then Okay again; you'll now be looking at a solid colour layer. Just one more step. Go to the layer blending modes and scroll almost all the way down the list of choices to the bottom, and choose Color. That's it! You've now created a duo-tone image. (Let me know if any of the steps confuse you and I'll do my best to clear it all up.)
Experiment with different colours; you'll get very dramatic effects with certain shades, depending on the photograph. I especially like the results using ochre tones. Give it a try, and if you post your results on your blog, leave me a comment here so I can go have a look at your art!

No comments:
Post a Comment